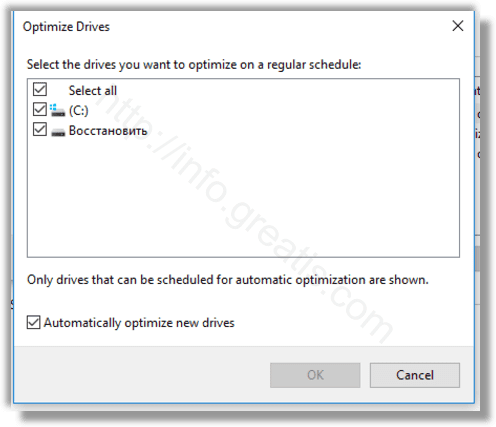
During active use, hard drive performance suffers due to file system fragmentation which notably slows down the access time. Modern Windows versions are smart enough to optimize drives and pick the right optimization method and time period depending on your drive specifications. If you need to change the default schedule, you can do so for individual drives or disable it completely. Here is how.
Here is How to Optimize Drives by Schedule In Windows 10:
- STEP 1: At first, open File Explorer.
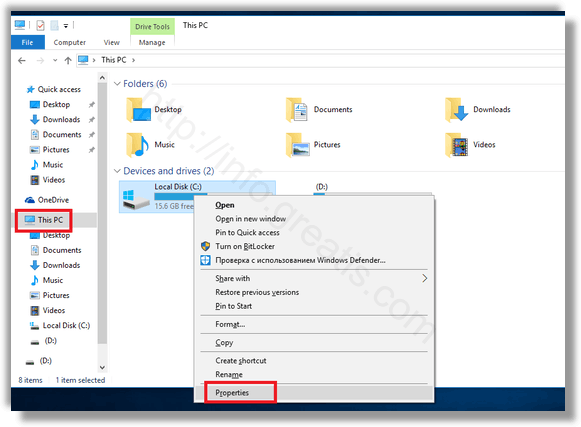
- STEP 2: Then navigate to the This PC folder. Right click the drive you want to change the schedule for and select Properties from the context menu.
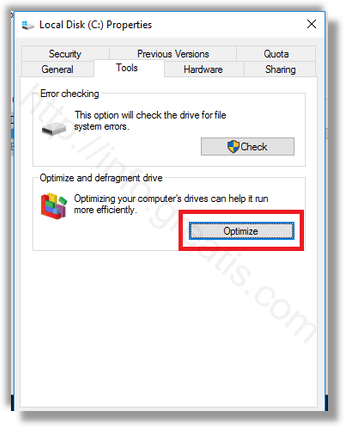
- STEP 3: After that switch to the Tools tab and click the button Optimize under Optimize and defragment drive.
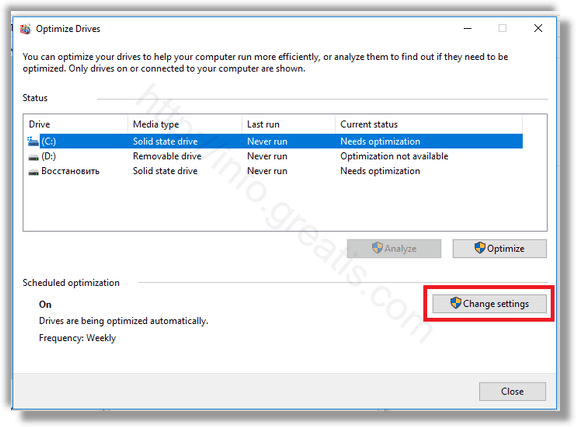
- STEP 4: In the next window, click on the Change settings button as shown below.
- STEP 5: The next dialog will allow you to adjust the schedule settings. Untick the check box Run on a schedule to disable it completely. But when the schedule is enabled, you can select Daily, Weekly, or Monthly frequency according to your needs.
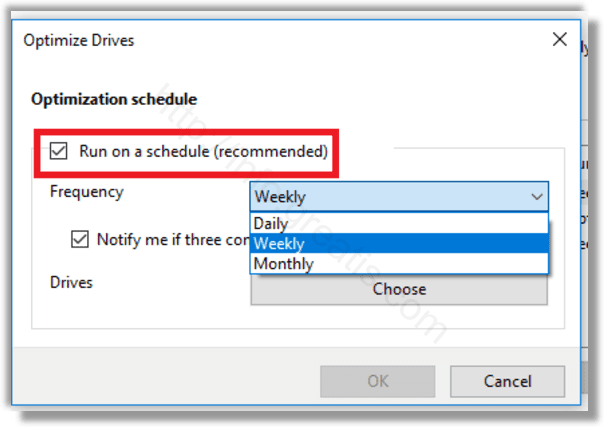
You can also turn on the option Notify if three consecutive scheduled runs are missed to stay notified about missed optimizations. - STEP 6: Next to Drives, you can click the Choose button to specify the drives you want to schedule optimization for.
