These days, device drivers and even apps like web browsers can add various services to Windows 10. The operating system itself has a huge number of services which exist out-of-the-box. The ability to delete a service is very useful when you have uninstalled some software, but its uninstaller leaves the service behind and does not uninstall it correctly. Here is how you can remove a redundant service.
Here is How to Delete A Service in Windows 10:
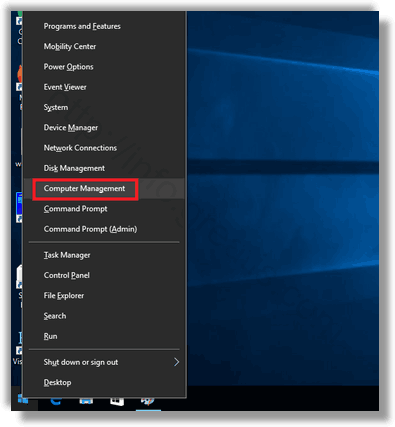
- STEP 1: Press Win+X shortcut keys on the keyboard to open the Power user menu. Alternatively, you can right-click on the Start menu. In the menu, select the item Computer Management.

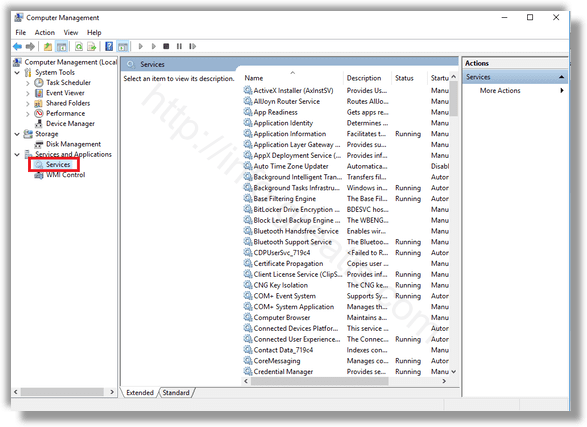
- STEP 2: The Computer Management utility will be opened. On the left, expand the tree view to Services and Applications\Services. On the right, you will see the list of installed services.

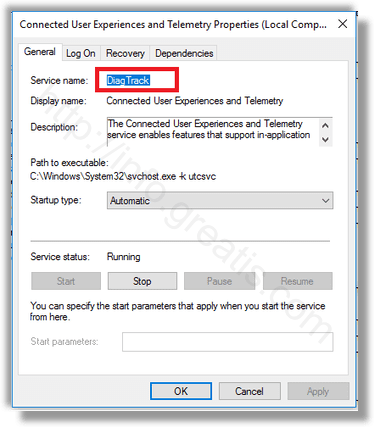
- STEP 3: Then find and double-click the service you want to remove. For example, I am going to remove the Telemetry and User Tracking-related service called “Connected User Experiences and Telemetry”.
Note: I do not recommend you to delete this service. I use it just as an example for this article.

- STEP 4: Then you need to copy the service name (it is highlighted in the screenshot above). Just select it and press Ctrl + C on the keyboard. In my case it is DiagTrack.
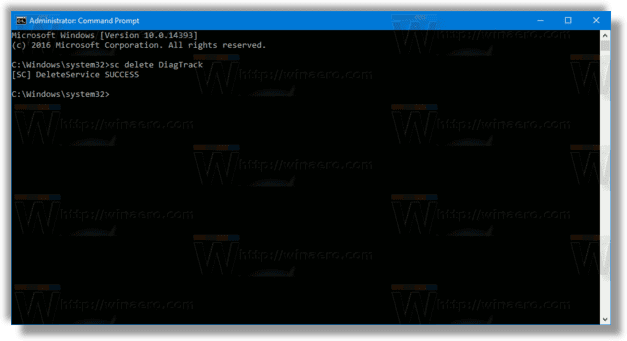
- STEP 5: Now, open an elevated command prompt and type the following command:
sc delete service_nameReplace service_name with the name of your service. e.g.
sc delete DiagTrackWhen the operation is successful, you will see the line “[SC] DeleteService SUCCESS” in the output.

- STEP 6: Now, return to the service list and press F5 to refresh it. The service will disappear from the list.
Warning: I do not recommend you to delete ANY service unless you know what you are doing. It will be almost impossible to restore a deleted system service without performing a full in-place reinstall. If some critical service is deleted, the operating system won’t start.