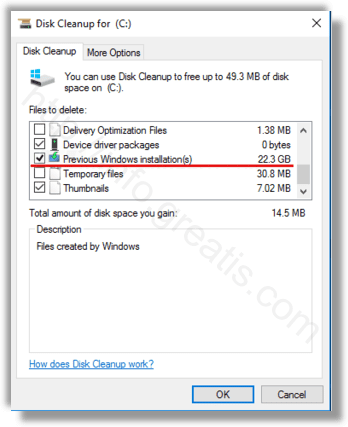
When you do an in-place upgrade from a previous version of Windows, Windows 10 saves a lot of files from the earlier installed OS during the upgrade and fills your hard drive with files that you might never need again if your upgrade is successful. The reason setup saves these files is so that if something goes wrong during setup, it can safely rollback to the earlier version of Windows. However, if your upgrade was successful and you’ve got everything working perfectly, then there’s no need to keep these files. You can reclaim all the wasted disk space by following these simple instructions.
Here is How to Free Up Disk Space After Windows 10 Version 1703 Upgrade:
- STEP 1: Press
 shortcut keys together on the keyboard to open the Run dialog.
 - STEP 2: Type cleanmgr in the Run box.

- STEP 3: Select your system drive (if necessary).
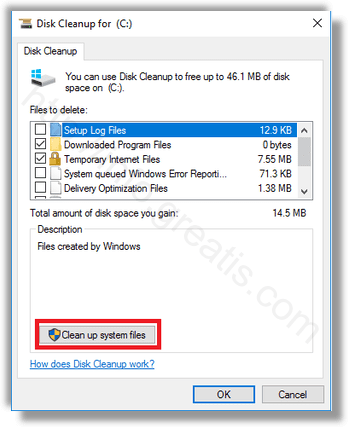
- STEP 4: Click the Clean up system files button to switch the Disk Cleanup tool to extended mode.
- STEP 5: Find and check the Previous Windows installation(s) item. Press OK.