The option called Turn off hard disk after is a part of power management options of the current power plan. The user can enable or disable it. Depending of the selected power plan, it can be enabled or disabled out of the box. For example, it is enabled in the Balanced and Power Saver power profiles, and disabled in the Performance power plan.
When enabled, your HDD will be turned off after your PC being idle during the configured period of time. The hard drive engine will be stopped and its disks will not spin. Next time your software access the drive, it will take a few seconds before the drive start spinning and give access to files.
Note: This option doesn’t affect solid state drives (SSD). They have no spinning parts and more power efficient than the classic HDDs.
Here is How to Turn Off Hard Disk After Idle in Windows 10:
- STEP 1: At first, execute control.exe powercfg.cpl,,3 from the Run dialog or in a command prompt.
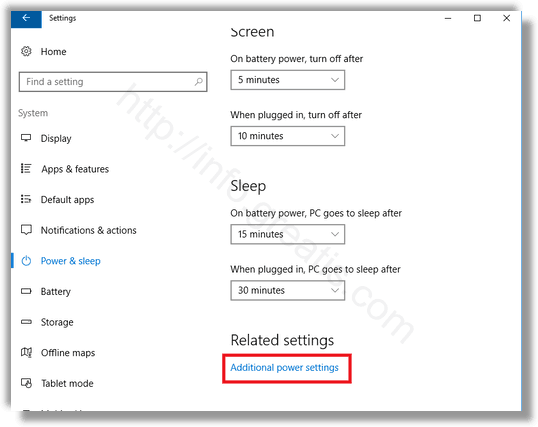
Alternatively, you can open Settings and go to System – Power & sleep. - STEP 2: Then, on the right, click on the link Additional power settings.
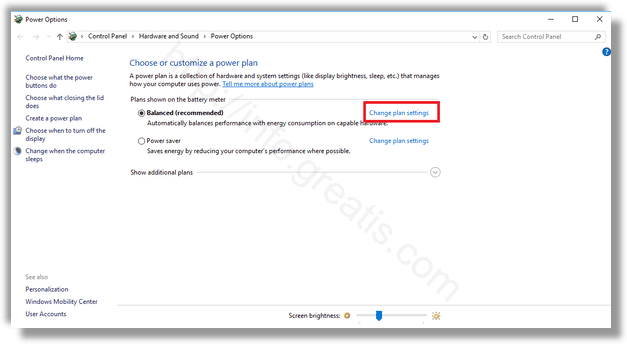
- STEP 3: The following dialog window will be opened. There, click the “Change plan settings” link.
- STEP 4: In the next dialog window, click on Change advanced power settings, and in the new window expand the Hard disk group and open the Turn off hard disk after option.
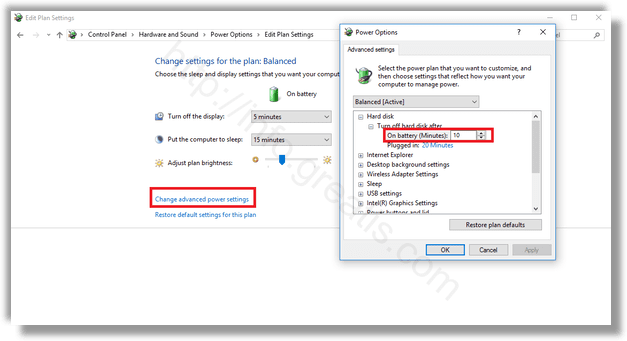
Set how many minutes of idle should gone before the drive will be turned off. Set it to never to disable this feature if you want.
The default value of the option is 20 minutes.