By default, Windows 10 automatically assigns drive letters to connected drives, including internal and external drives. The operating system goes through the alphabet from A to Z to find the first available letter to assign it to various drives. Historically, it reserves the drive letters A and B for floppy drives. But what if you want to change a dive letter for one of your drives? No problem. Here is how.
Here is How to Change Drive Letter in Windows 10:
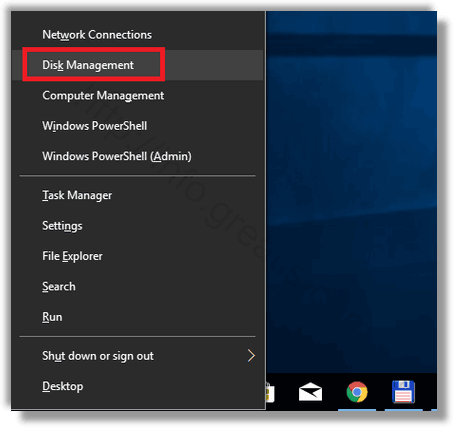
- STEP 1: At first, press Win+X and select Disk Management in appeared window.

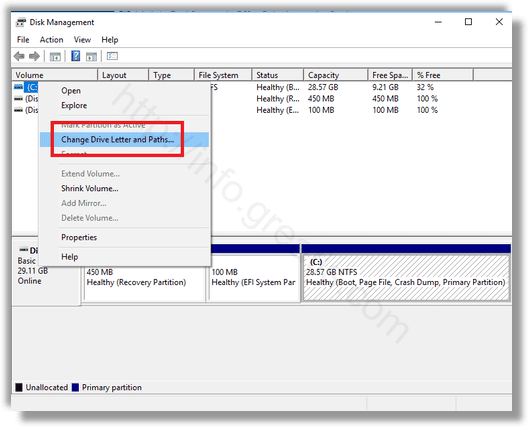
- STEP 2: After that, right-click on the partition whose drive letter you would like to change. Select Change Drive Letter and Paths in the context menu.

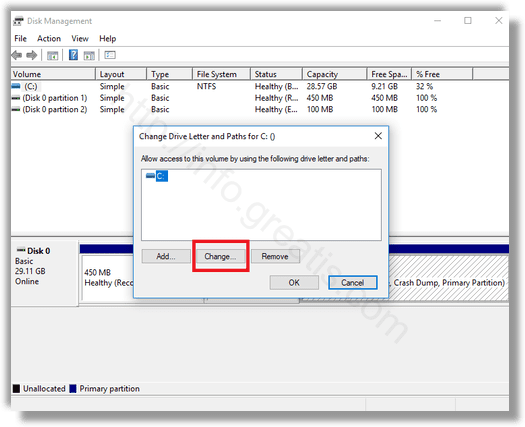
- STEP 3: Then click on the Change… button.

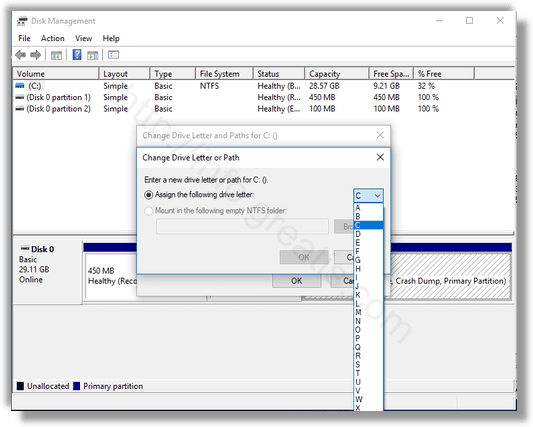
- STEP 4: Finally, select Assign the following drive letter, choose the desired letter in the drop down list and confirm your choice.
