To fix various problems with the OS, Windows 10 comes with a number of built-in troubleshooters. Sometimes they are really useful and can resolve the issue quickly. Once you run a troubleshooter, a history of its details is kept, so you will be able to view it at any moment later. But you can remove Troubleshooting History if you wish. Here is how.
Here is How to Clear Troubleshooting History in Windows 10:
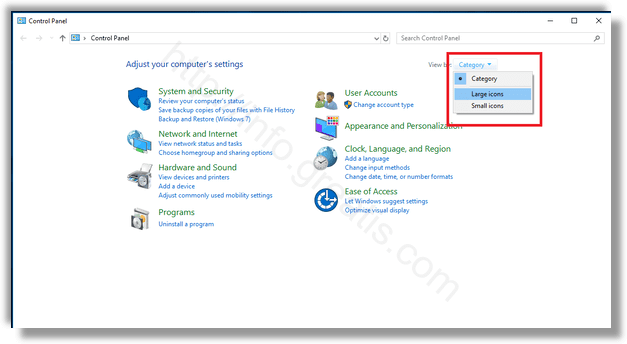
- STEP 1: At first, open the Control Panel.

- STEP 2: Then switch to the Large icons view.
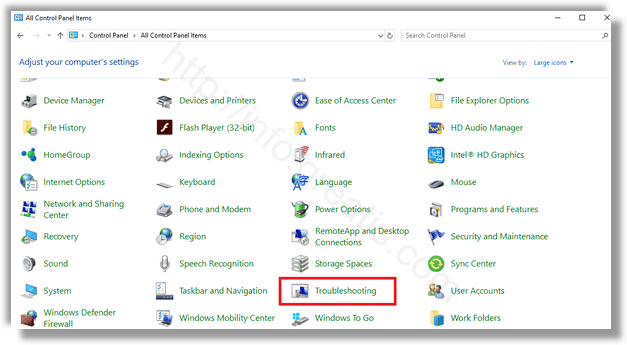
- STEP 3: After that click on the Troubleshooting icon.
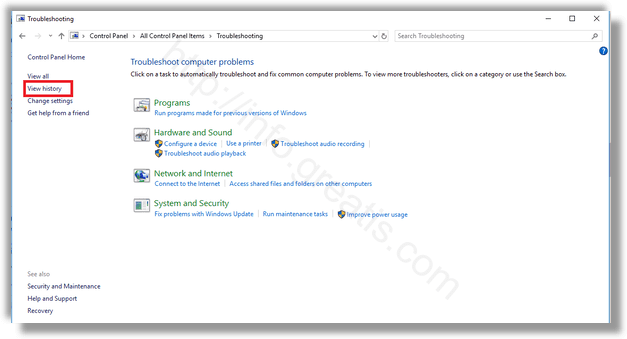
- STEP 4: Then on the left, click on the link View history.
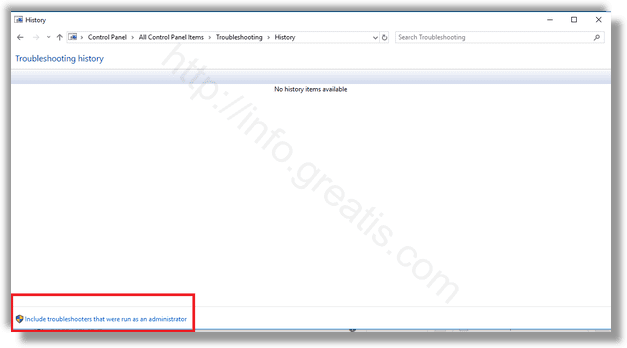
- STEP 5: If you are signed in as an administrator, click on the link Include troubleshooters that were run as an administrator.
- STEP 6: Finally you’ll see the stored troubleshooting history for your computer. Select the desired event and click on the Delete button, or simply right-click on the row and select the same command in the context menu.