Disappearing Disk Space is a common scenario for most computer users. Most of us use the built-in Disk Cleanup Tool or something else to do the job. Windows 10 users have another option, and that is via Windows 10 Settings.
Here is How to Free Up Disk Space in Windows 10:
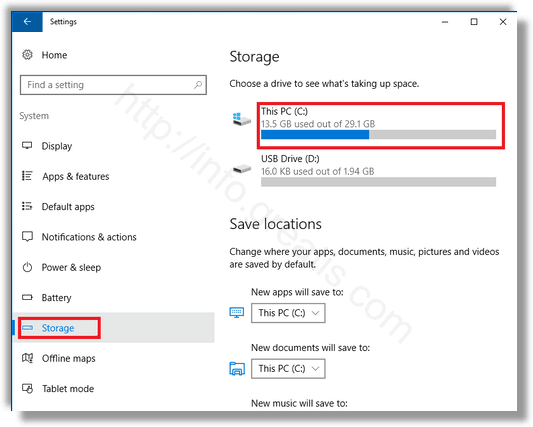
- STEP 1: Open the Settings of your Windows 10, select System. Click on Storage to open the following panel.

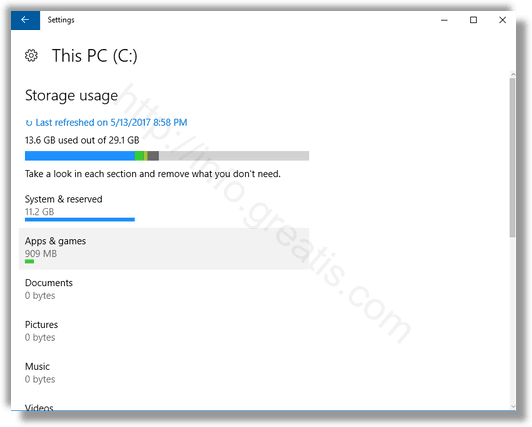
- STEP 2: Here, under Local Storage, you will see your drives listed along with the disk space that has been used. Select the drive you would like to know more details like the nature of files that are stored and the disk space they consume.

- STEP 3: Clicking on any item will open up another panel where you will see a button that lets you manage that item and the disk space it occupies. This post show more in detail how to manage Disk Space & Storage using Windows 10 Settings.
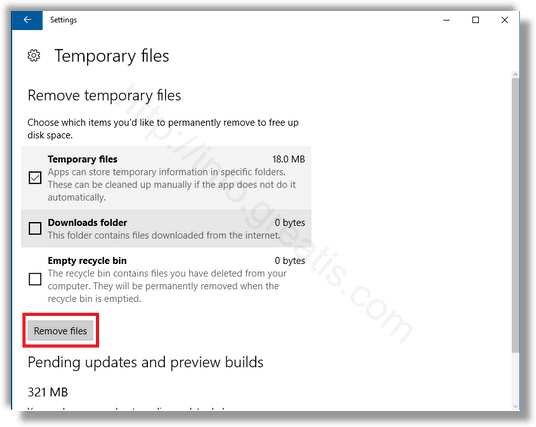
To delete the temporary junk files, scroll down to Temporary Files option and click on the option. The following panel will open.
- STEP 4: The options available for removing four different type of temporary files will be listed. Select Remove files to clean up the unwanted files. Depending on what is available for deletion, you will see the following options for cleaning up four categories of files from your disk drive:
Temporary Files
Downloads Folder
Empty Recycle Bin
Previous version of Windows
Please note that the option to clean up files would not appear on your computer screen if there’s no previous version of Windows on your system.
Select the files you want to delete and then press the Remove files button.