Windows 10 stores all user preferences and settings in a user profile. The user profile is a folder located in C:\Users\. It includes all account settings like the selected desktop background, screen saver, etc. Sometimes you may need to rename this folder after creating the user profile. Here is how it can be done.
Here is How to Rename User Profile Folder:
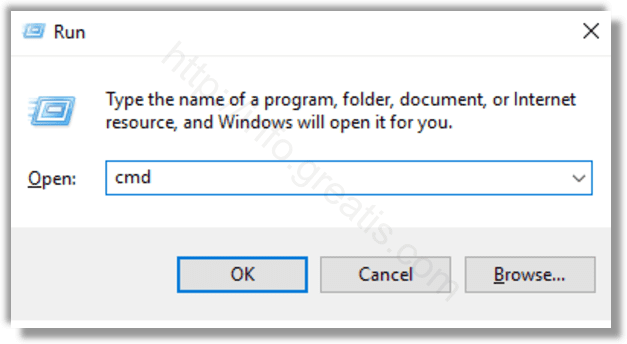
- STEP 1: At first, press Win+R keys, type cmd and press OK to run the Command Prompt.
- STEP 2: Type and run the following command:
wmic useraccount list full
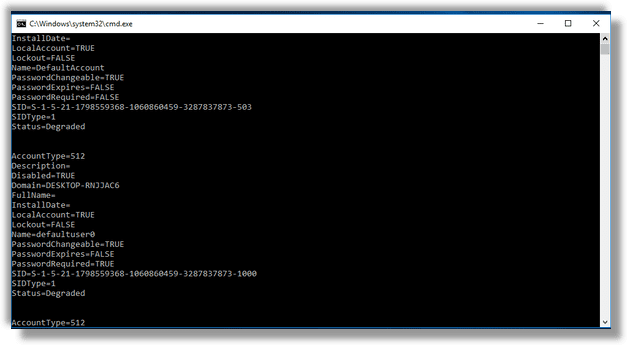
- STEP 3: Note the SID value for your account and remember it.
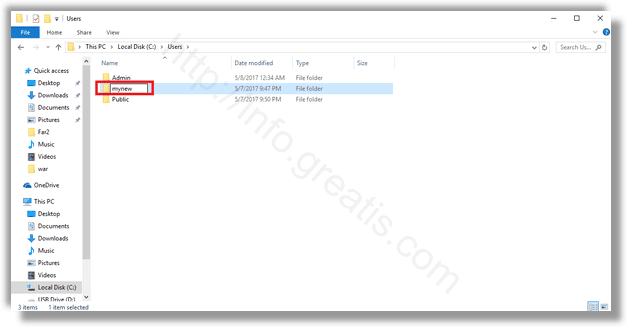
Important notice: You cannot rename the current user profile which you are signed in with. You need to use another user account with administrative privileges. - STEP 4: After that go to the c:\Users folder from the other Administrator account and rename your profile folder to what you want.
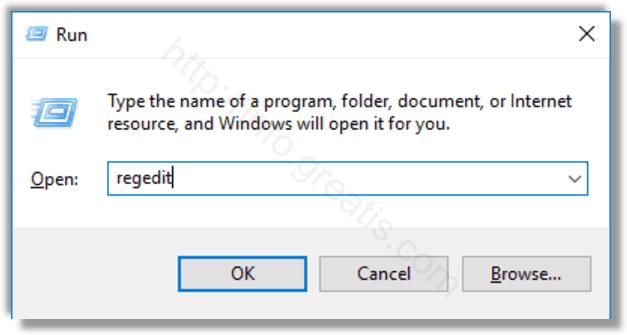
- STEP 5: Then open the Registry Editor. To do so, just press Win+R keys, type regedit and press OK.
- STEP 6: Now find the following Registry key:
HKEY_LOCAL_MACHINE\SOFTWARE\Microsoft\Windows NT\CurrentVersion\ProfileList - STEP 7: In the left pane you need to find the key named by the SID value you have remembered.
This key is related to the profile which you’ve renamed.
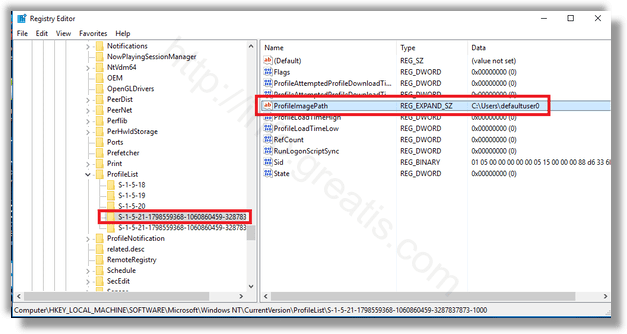
- STEP 8: At last find the value data for the ProfileImagePath parameter on the right. Modify it according to the new path to the profile you have renamed, and restart Windows.