A Network Location shortcut in This PC is similar to a mapped network drive, but it has a number of differences. While both the mapped network drive and the Network Location shortcut would point to a resource on your network, there won’t be a drive letter assigned to the shortcut. Let’s see how to do that.
Here is How to Add Network Location to This PC in Windows 10:
- STEP 1: At first, open This PC in File Explorer.
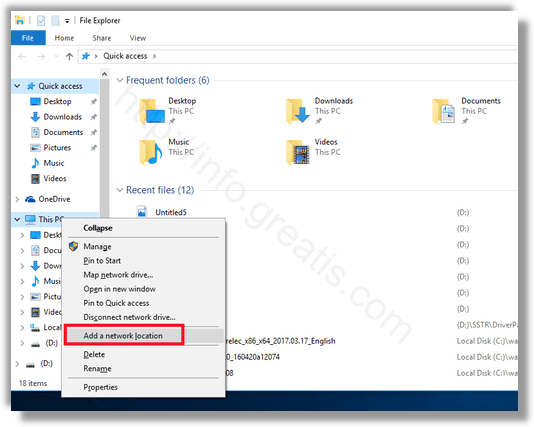
- STEP 2: Then right-click This PC and select Add a network location from the context menu.
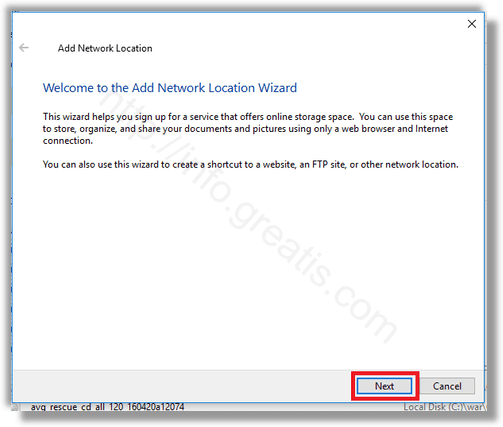
- STEP 3: The Add Network Location wizard will be opened. Click the Next button.
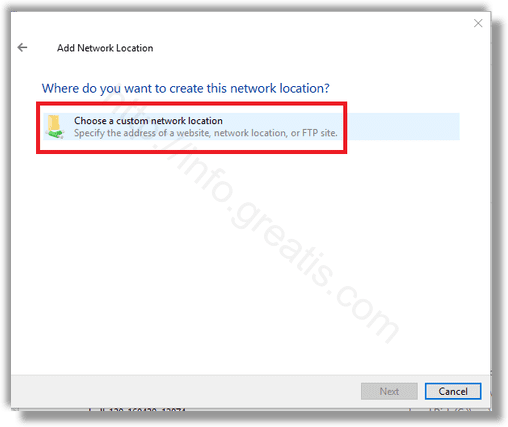
- STEP 4: After that, click Choose a custom network location to select the target destination of your shortcut.
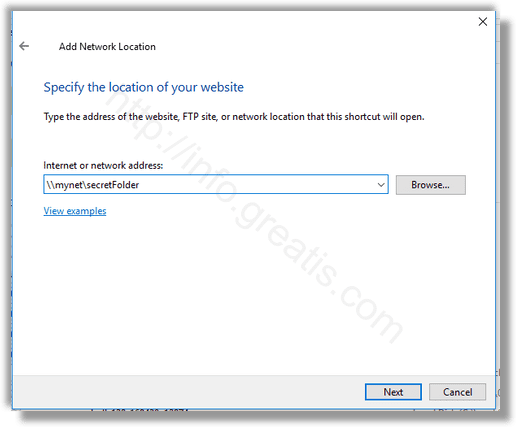
- STEP 5: And then type the desired network location address. Depending on your location type, specify the credentials for the location if required.
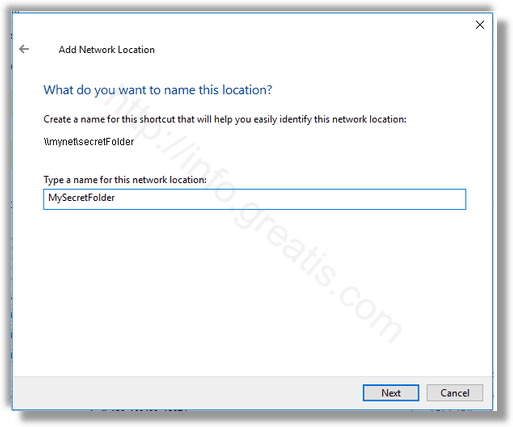
- STEP 6: On the next page, type the desired name for your location.
- STEP 7: The last page will allow you to open the location directly. Untick the checkbox Open this network location when I click Finish.
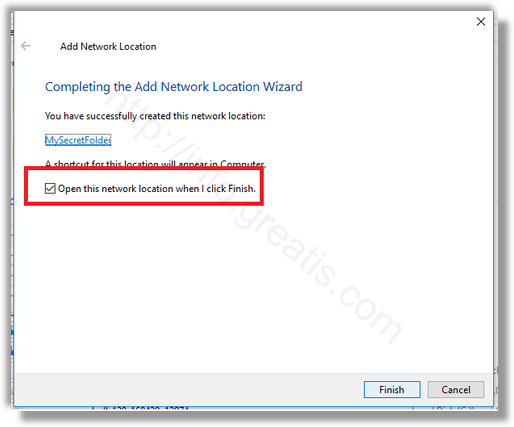
So, the location of the network shortcut will be visible in This PC.