The most popular way to search is the search built into File Explorer. There is a special text box in the top right corner of the app’s window which you can use to perform a search quickly. Every time you search for some file name pattern or condition, File Explorer saves it in the history. Here is how to disable the search history.
Here is How to Disable Search History in Windows 10 File Explorer:
- STEP 1: At first, open the Registry Editor. To do so, just press Win+R, type regedit.exe and press OK.

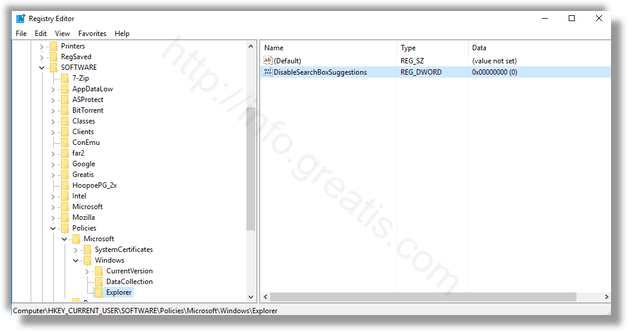
- STEP 2: Then go to the Registry key HKEY_CURRENT_USER\Software\Policies\Microsoft\Windows\Explorer. If you do not have such a key, then just create it.
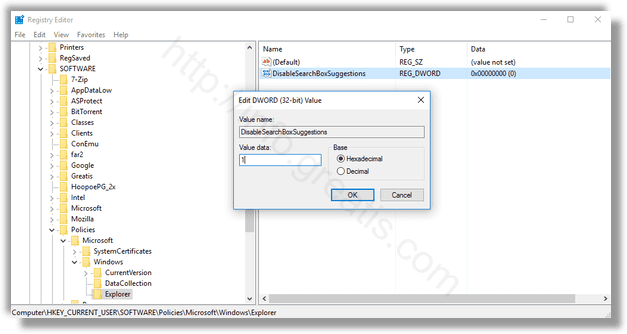
- STEP 3: After that, create a new 32-bit DWORD value DisableSearchBoxSuggestions. Set it to 1 to disable the search history in File Explorer.
- STEP 4: At last, sign out and sign in again to your user account to make the changes take effect.