Network Discovery – is a network setting, using which you can set whether other computers on the network can see your computer. If Network Discovery is enabled, sharing files and printers over a network becomes easier.
If you remember, when you first connected to any network on your Windows PC, you would have been asked if it was a Private, Public or a Domain base network.
Here is How to Enable or Disable Network Discovery in Windows 10:
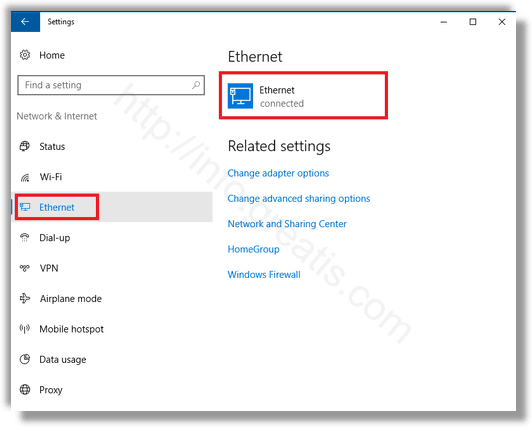
- STEP 1: Click on the Start button and open Setting and select Network & Internet and then Ethernet (or Dial-Up or Wi-Fi).
- STEP 2: Select the network and then click on Properties. From the panel which opens, turn the slider to the Off position for the Make this PC discoverable setting.
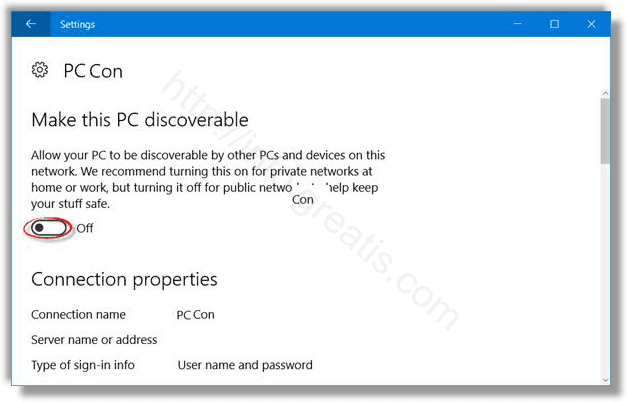
To enable it again, simply move the slider back to the On position.
For WiFi Networks, just Open Settings > Network & Internet > Wi-Fi > Manage known networks. Then select a WiFi network and choose Properties. Turn slider to the Off position the Make this PC discoverable setting.
Sure, you may do the same with Windows 10 Control Panel.
To do so, open Control Panel > All Control Panel Items > Network and Sharing Center. Click Advanced sharing settings.
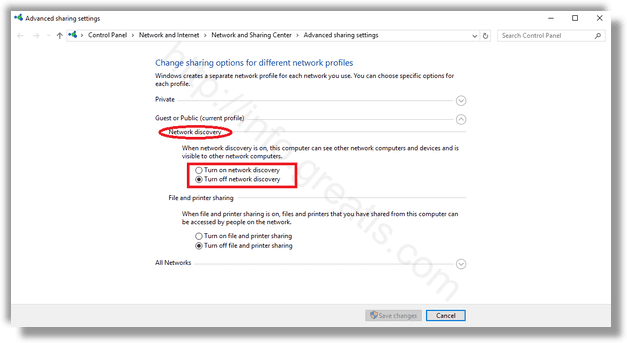
Uncheck the Turn on Network Discovery checkbox for all profiles, and save the changes.