Before we start, here are some details about how RDP works. While any edition of Windows 10 can act as Remote Desktop Client, to host a remote session, you need to be running Windows 10 Pro or Enterprise. You can connect to a Windows 10 Remote Desktop host from another PC running Windows 10, or from an earlier Windows version like Windows 7 or Windows 8, or Linux. Windows 10 comes with both client and server software out-of-the-box, so you don’t need any extra software installed.
Here is How to Enable Remote Desktop (RDP) in Windows 10:
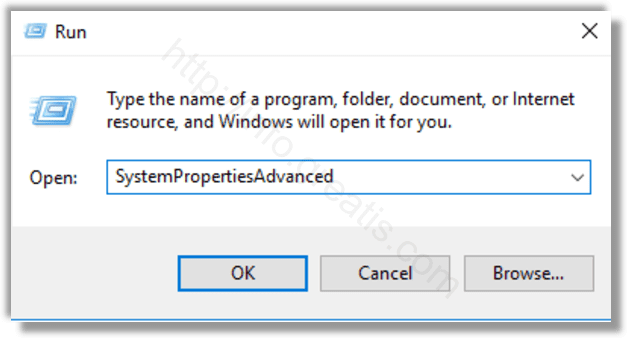
- STEP 1: Press
 hotkeys on the keyboard. The Run dialog will appear on the screen, type SystemPropertiesAdvanced into the text box and press Enter.
- STEP 2: System Properties will open. Go to the Remote tab.
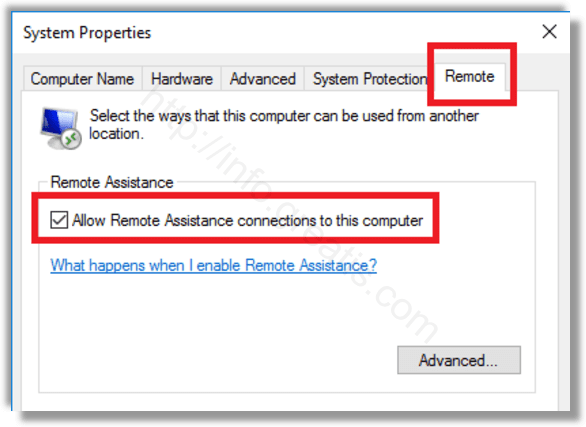
- STEP 3: In the “Remote Desktop” box, select the option Allow remote connections to this computer. It is disabled by default.

If you are going to connect to this computer from Windows Vista or Windows XP, untick the option “Allow connections only from computers running Remote Desktop with Network Level Authentication”. Otherwise, older versions of Windows won’t be able to connect to your Remote Desktop.
- STEP 4: Users with administrative privileges already have rights to connect over RDP. If you need to allow the connection for a regular user account, click the “Select users” button, and select a regular user to allow him the connection.