In Windows Vista and later, Microsoft ditched the System Restore service. Instead, Task Scheduler is used to create restore points. Also, Microsoft wants to save disk space on devices with limited storage. With newer features like Reset & Refresh which work differently, System Restore has taken a back seat although it is still accessible via Troubleshooting and Recovery options in Windows 10.
By default, this important feature is disabled in my Windows 10. So it needs to be turned on if you are going to use it.
Here is How to Enable System Protection in Windows 10:
- STEP 1: At first, press
 keys together on the keyboard. The Run dialog will appear. Type SystemPropertiesProtection in the Run box.

- STEP 2: The System Properties dialog will appear with the System Protection tab active.
Click the Configure button. In the next dialog, set the “Turn on system protection” option as shown below: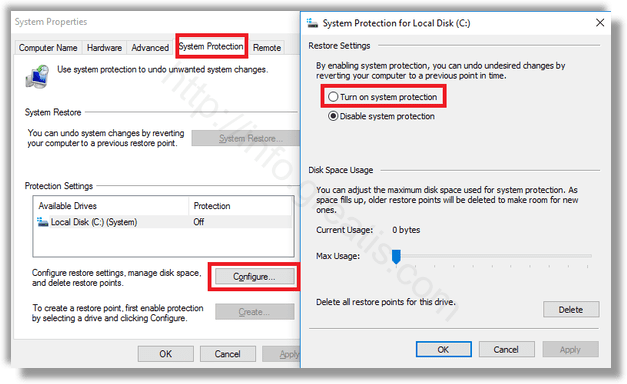
- STEP 3: Now, adjust the slider to the right. 15% should be enough:
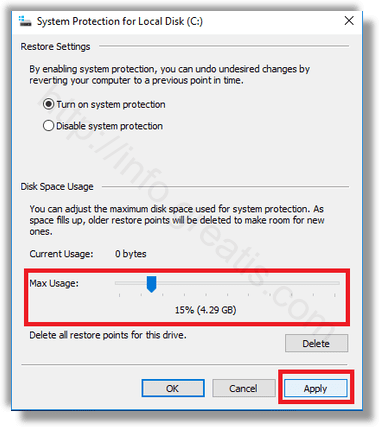
Then press Apply and OK. Note: As space fills up, older restore points will automatically be deleted to free up space for new points. - STEP 4: Repeat this operation for other drives if required.
So, here is some important notes:
1) In Safe Mode you won’t be able to change the System Protection options.
2) In Windows 10, the System Protection feature can only be enabled for drives formatted using NTFS.
3) If you disable this feature for a drive, all restore points stored on that drive will be deleted. Please keep this in mind, because you won’t be able to use System Protection to recover the operation system on that drive.