In most cases, your Internet Service Provider (ISP) provides their own DNS server which does its work. This DNS server is usually specified in your router or automatically fetched from the ISP. But in some cases, you may have a reason to switch to an external DNS server. Also Windows makes the name resolution process faster by caching resolved addresses. If the IP address of a website can be found in the local cache, it will be resolved faster. But you will need to flush DNS cache after changing you DNS settings. Here is how.
Here is How to Flush DNS Cache in Windows 10:
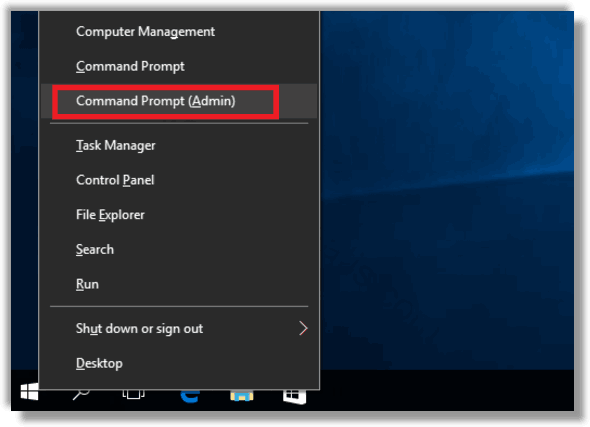
- STEP 1: At first, open an elevated command prompt.
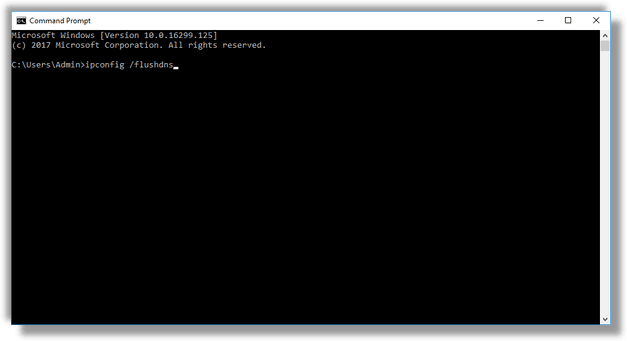
- STEP 2: After that, type the command ipconfig /flushdns. This is all you need to do to reset your DNS cache in Windows 10.