There are a number of ways to set your IP address to a static value in Windows 10. Here is how to do that in most simple way.
Here is How to Set Static IP Address in Windows 10:
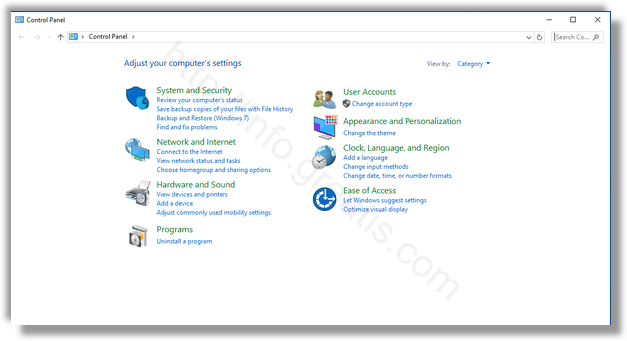
- STEP 1: At first, open Control Panel and go to Network and Internet\Network and Sharing Center.
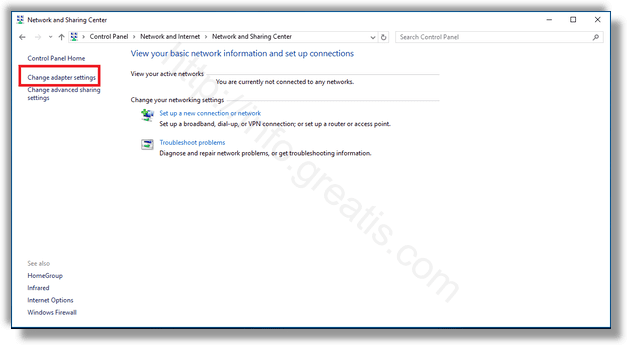
- STEP 2: Then on the left pane, click Change adapter settings.
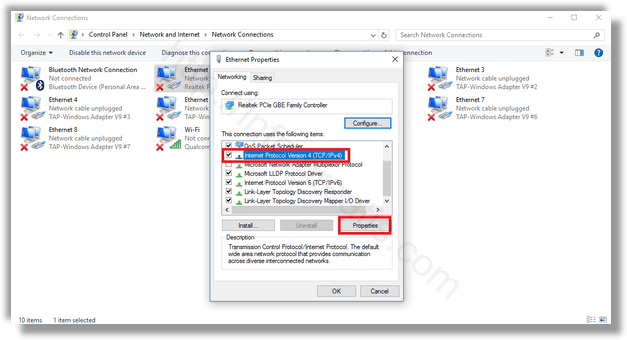
- STEP 3: After that, in the Network Connections folder, double click the desired network connection to open its properties.
- STEP 4: Then click on the Properties button, select Internet Protocol Version 4 (TCP/IPv4) in the list and click on the Properties button.
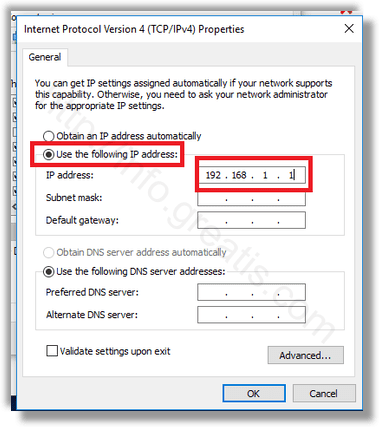
- STEP 5: At last, set the option Use the following IP address and type the desired IP address. Specify values for Subnet mask, Gateway and DNS servers also and press OK.