USB selective suspend is a very useful power management feature available in the Windows OS. It allows you to reduce the computer’s power consumption by suspending unused (inactive) USB ports. This will save battery life, so it is a good idea to ensure that you have it enabled. Here is how.
Here is How To Enable USB Selective Suspend in Windows 10:
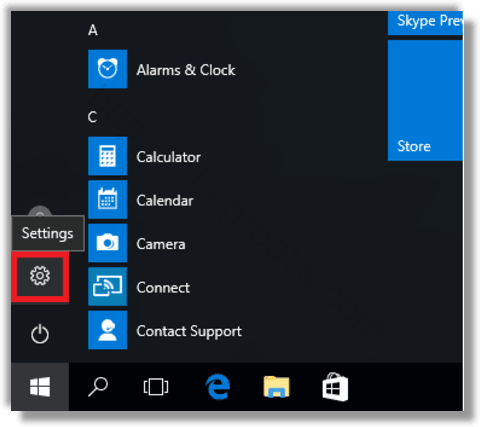
- STEP 1: At first, open the Settings app.
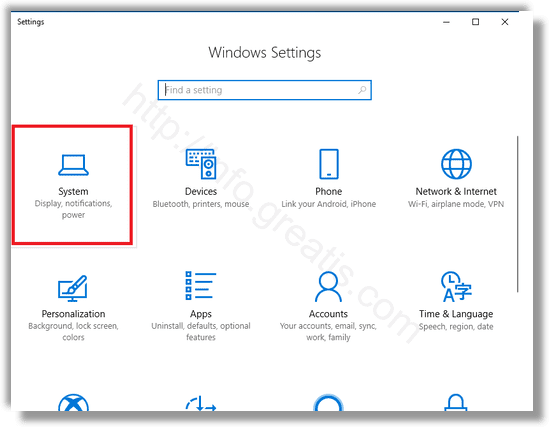
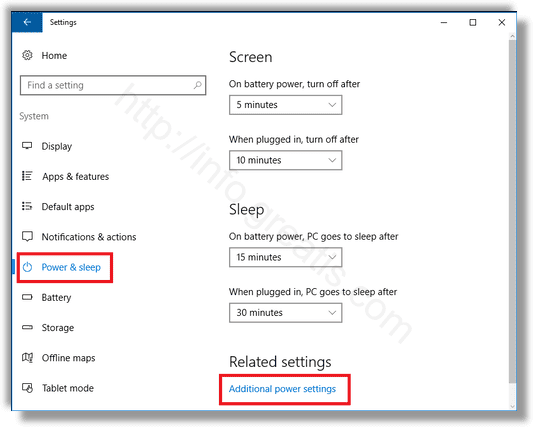
- STEP 2: Then go to System – Power & sleep.
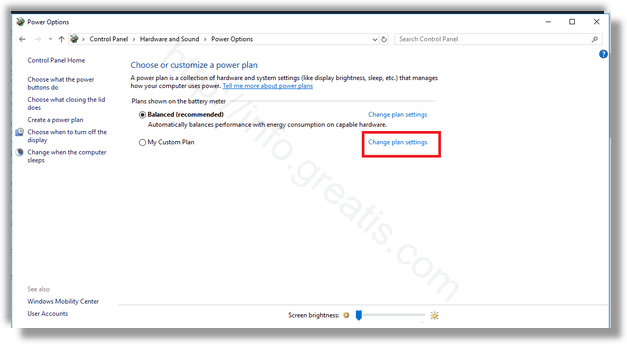
- STEP 3: After that, click on the link Additional power settings.
- STEP 4: Then click the link Change plan settings.
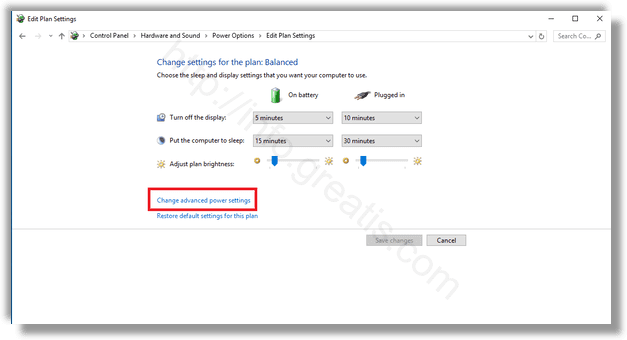
- STEP 5: In the next screen click the link Change advanced power settings.
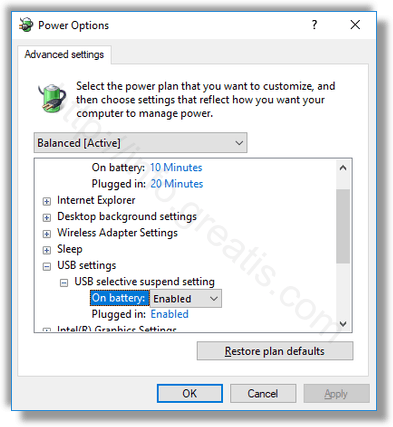
- STEP 6: Finally, expand USB Settings -> USB Selective suspend on the next window. Ensure that it is set to Enabled.